How the import works
The import reads course occurrence data from a Training Planner
.xls export, validates every row for completeness,
and — once the file is clean — creates attendance reports in
bulk. No manual data entry required.
Download the Excel file from Green Admin
The .xls export file is available in
Green Admin → Training Planner.
Once there, you will find a Download Excel
button — click it to download the file directly.
No date selection or extra steps are needed.
Once you have the file, only the following cells may be edited. Every other cell must remain exactly as downloaded — do not add, delete, move, or reformat any other cell:
-
Närvarande (present) — enter
1for present,0for absent -
Funktionsnedsättning (disability)
— enter
1to flag,0to clear -
Ledare (coach/leader) — enter
1to mark as leader,0otherwise - Personal number (personnummer) — correct any missing or malformed Swedish personal numbers
Any other edit — changing activity names, dates, course IDs, column headers, or adding/removing rows — will produce validation errors or cause course lookups to fail.
Upload the file to the Import page
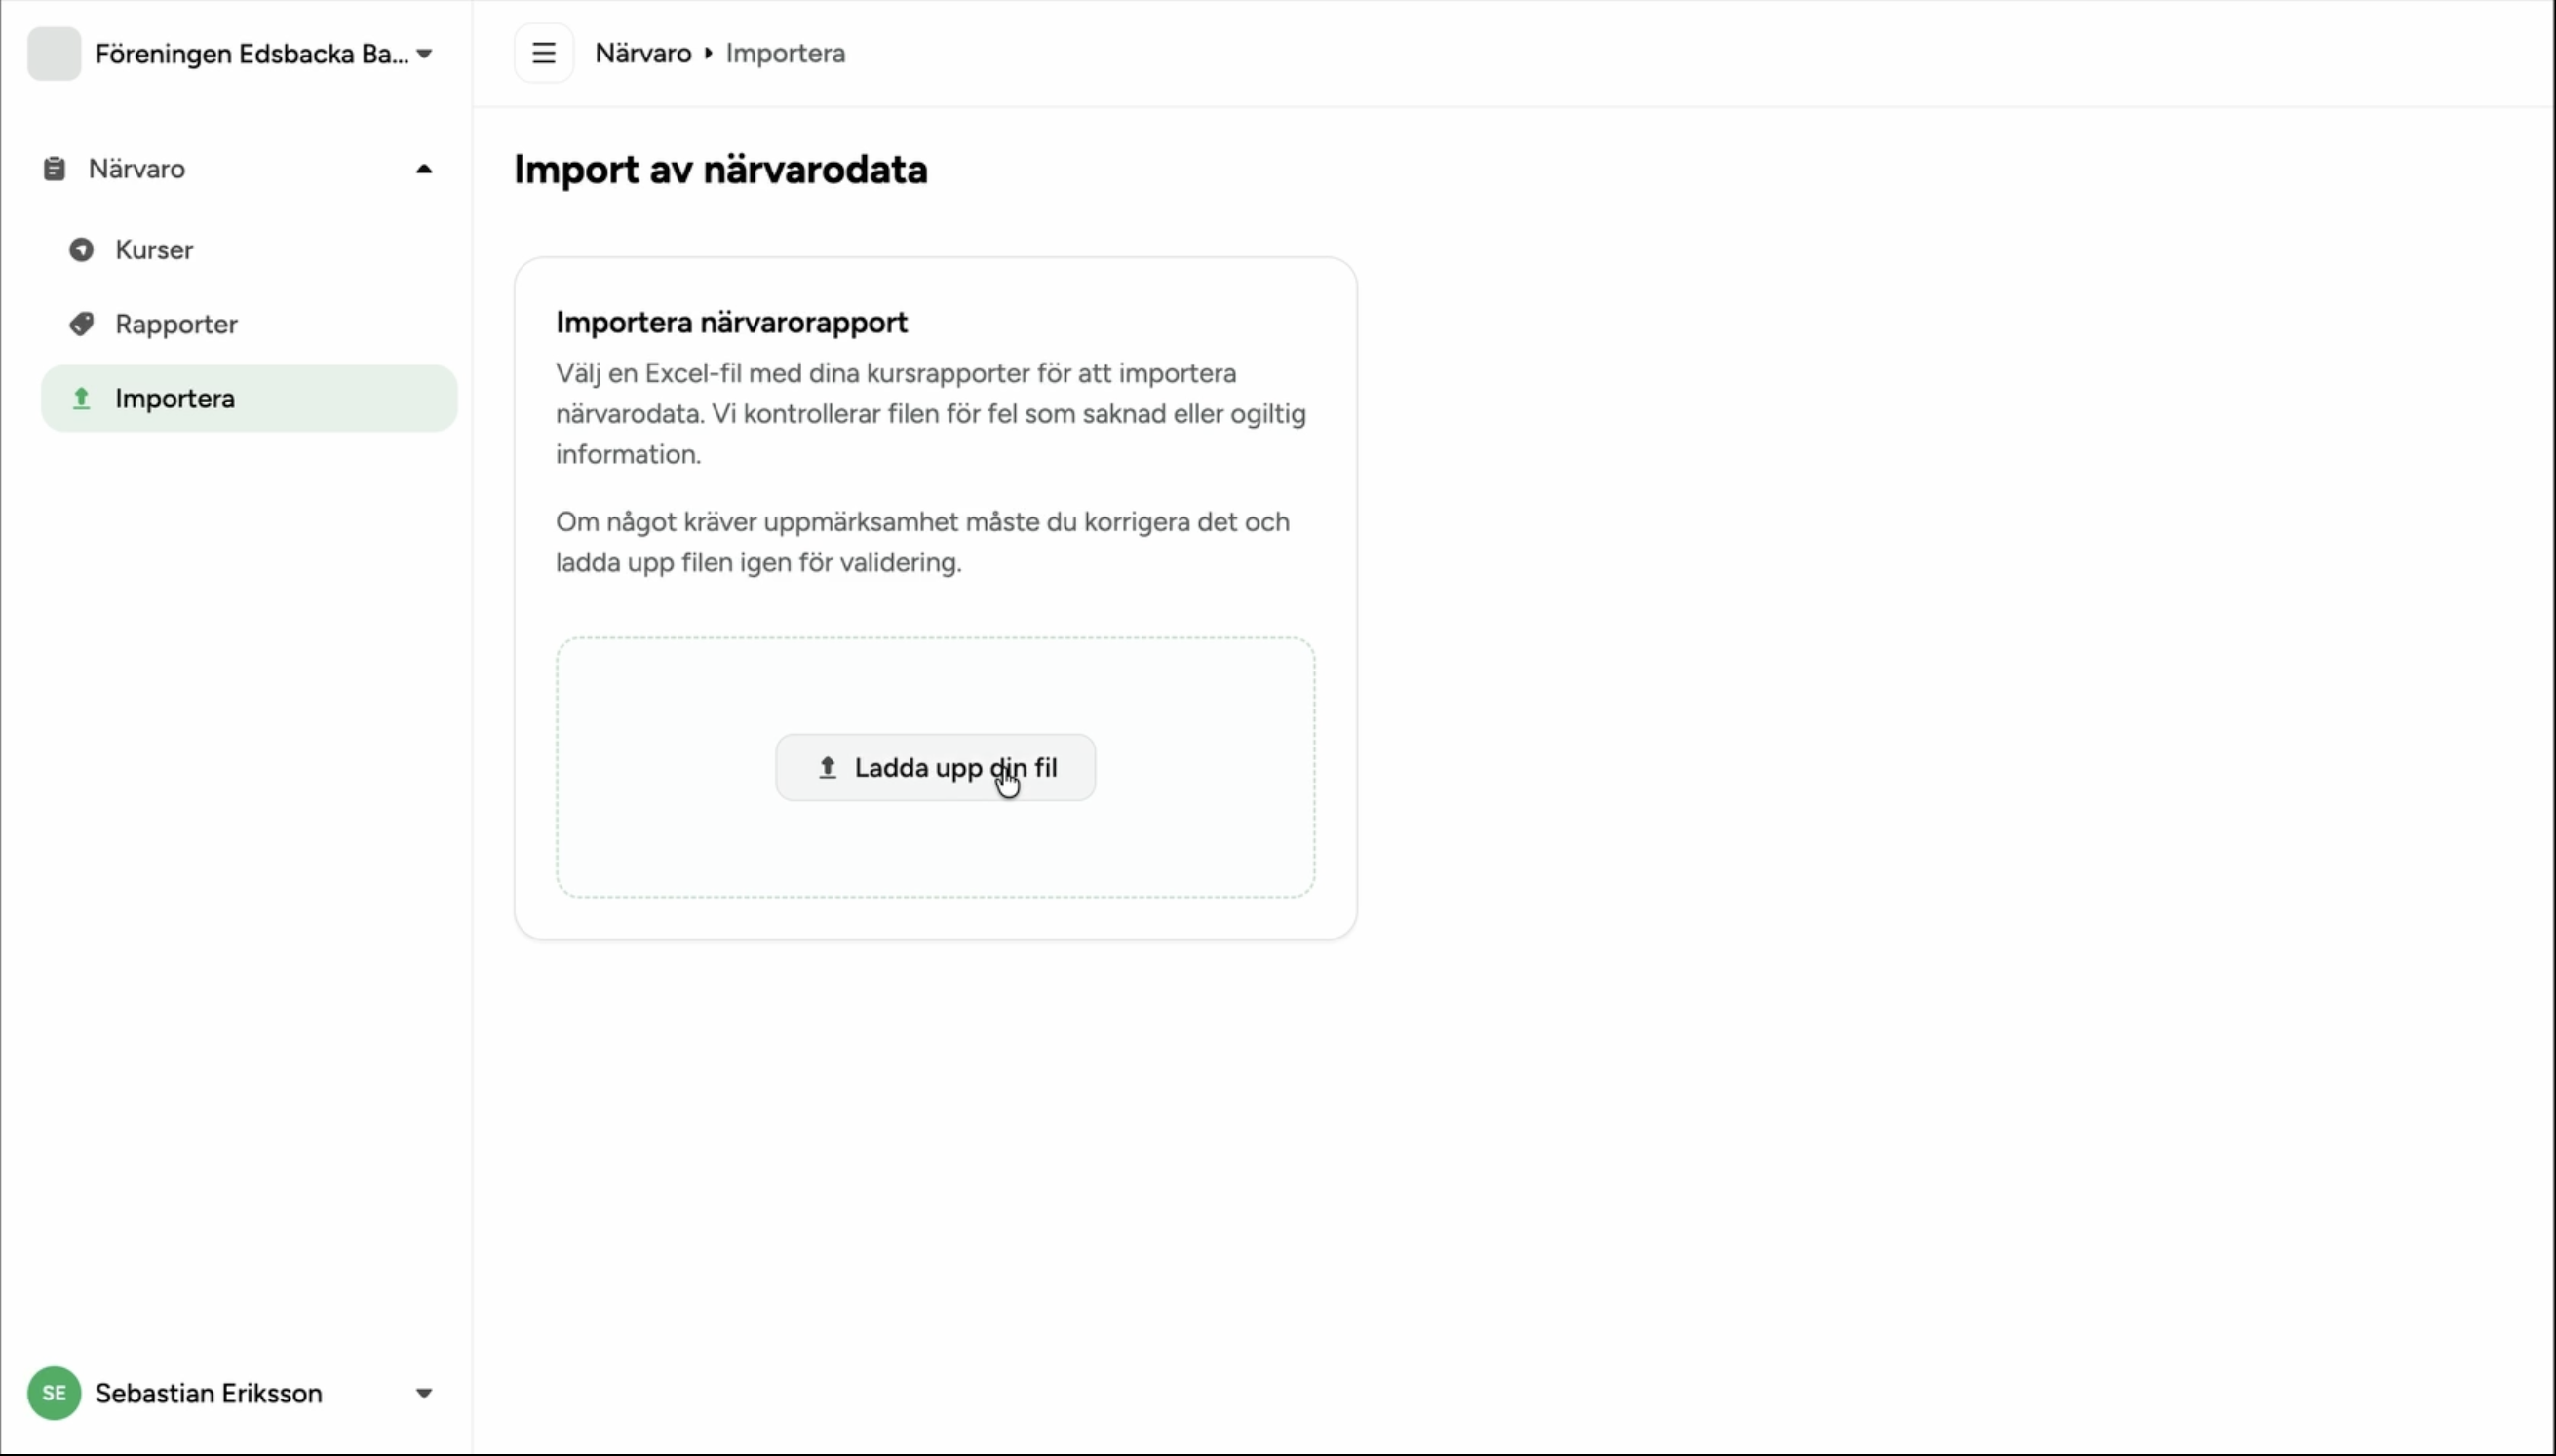
In the MATCHi admin app, go to Attendance → Import in the sidebar. You will see the import page with an upload zone.
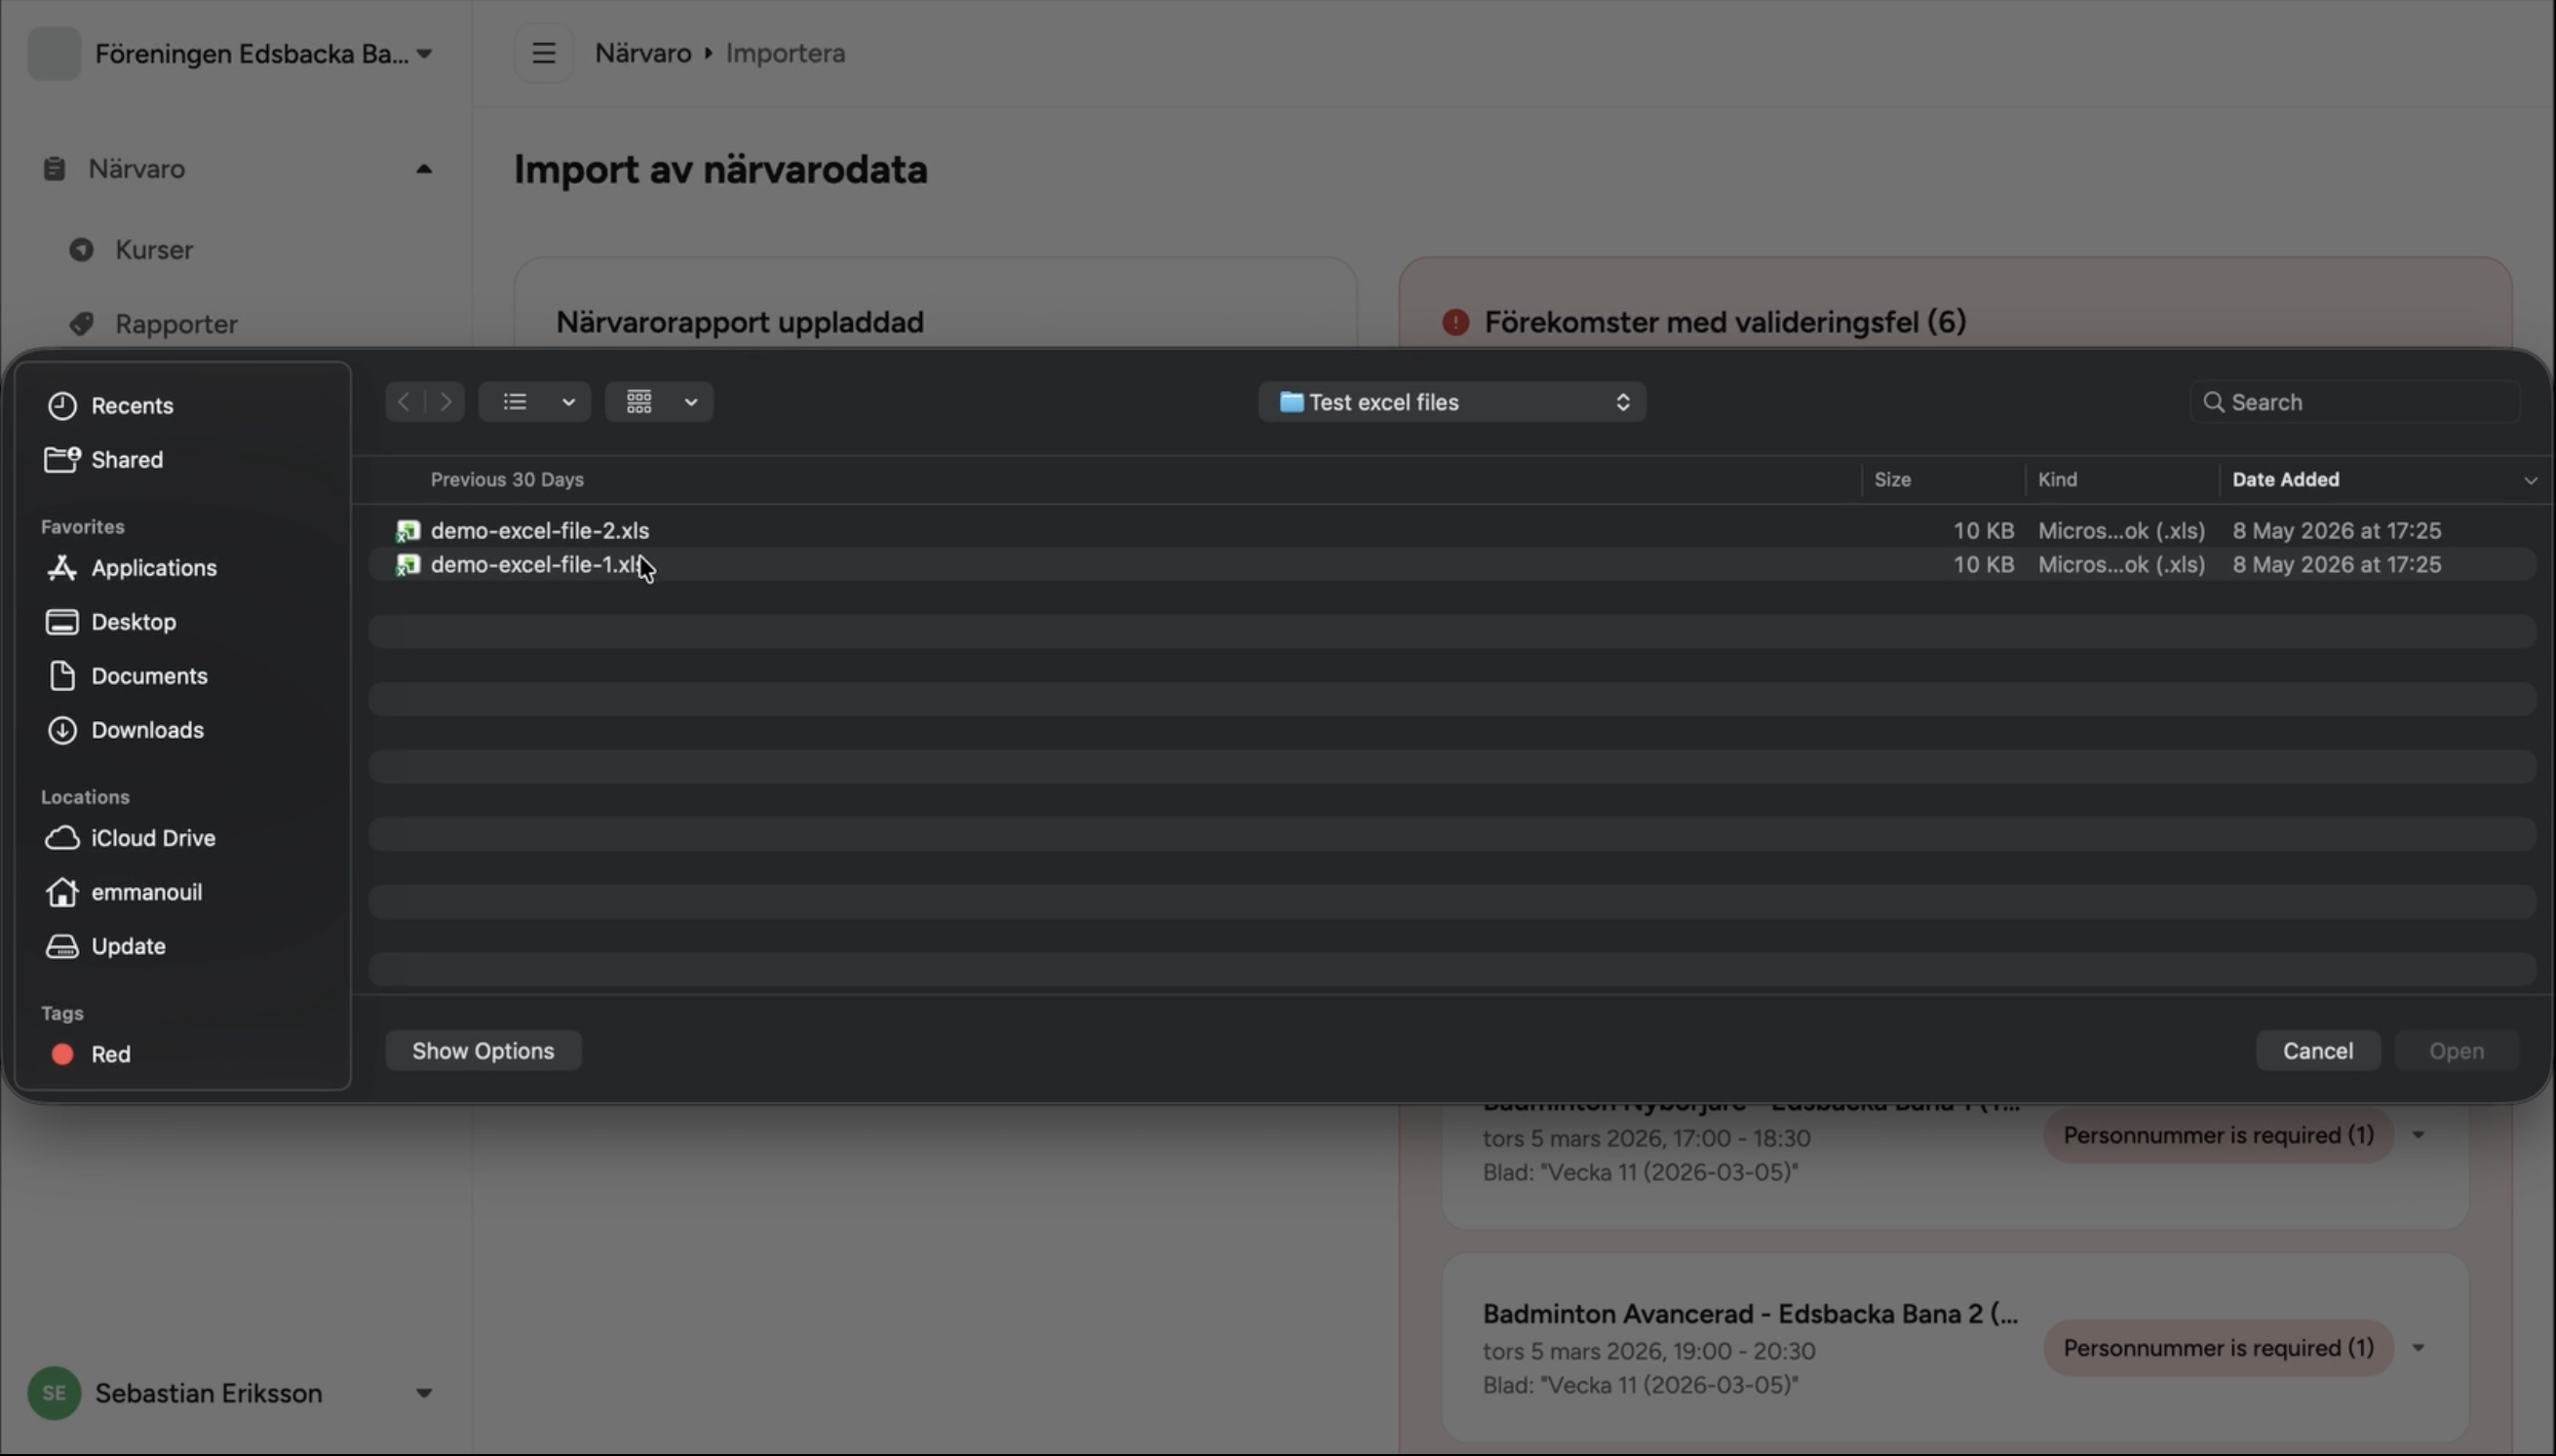
Drag and drop your .xls file onto the
upload zone, or click it to open the file picker.
The file is sent to the server immediately for validation
— a loading indicator appears during upload.
.xls — not .xlsx or any other format.
If you opened and edited the file in Excel or
another spreadsheet program, make sure to save
it back as Excel 97-2003 Workbook (.xls)
before uploading. Saving as .xlsx
or changing the file extension manually will
cause the upload to fail or the file to be rejected
as an unrecognised format.
.xls and
that the internet connection is stable, then
try again.
Review validation results
After upload, MATCHi automatically validates every occurrence (sheet + row) in the file. The result panel appears with one of the following states:
When errors are present, each problematic occurrence is shown in an expandable error card. Each card displays:
- Activity title, date range, and the sheet name it came from
- Error badges grouped by type, for example: Missing personal number (3)
- Expand the card to see the exact cell references with errors — up to 4 are shown inline; a "View all" link reveals the rest

Fix errors and re-upload
Open the original .xls file and correct
the cells identified in the error cards. The most
common fixes are:
- Adding a missing personal number to a participant row
-
Filling in a Närvarande,
Funktionsnedsättning, or Ledare
value that was left blank — it must be
0or1 - Removing a row for a participant who should not be in the report
- A cell that was accidentally deleted or cleared — e.g. a personal number or attendance value that was there in the original file but is now empty
-
A
text string or unexpected value typed into a cell
that should only contain
0or1— for example, writing "yes" or "x" in a Närvarande column - A value entered in a completely wrong cell — a stray character or number placed outside the editable columns, which the validator reads as corrupted data
Once you have made your corrections, save the file and return to the Import page. Upload the corrected file — the previous upload is automatically replaced and validation runs again from scratch.
Repeat this cycle until the validation panel shows no errors. Only then will the Generate Reports button become active.
What gets skipped — and possible import errors
Not every occurrence in the file results in a new report. The following cases are expected and do not indicate a problem:
| Reason | What happens | Outcome badge |
|---|---|---|
| Report already exists | An attendance report for the same occurrence (same course + date) already exists in MATCHi. The occurrence is silently skipped. | Skipped |
| Course not found | The activity name in the file does not match any course currently active in MATCHi for this facility. This can happen if a course was renamed, deleted, or moved. | Failed |
| All participants absent | Every participant in the occurrence is marked absent. The occurrence is skipped entirely — no report is created. Mark at least one participant as present in the Excel file if a report is needed. | Skipped |
| No participants | The occurrence sheet has no participant rows at all. An empty report is created but flagged — it will need participants added before it can be sent to RF. | Empty |
| Duplicate upload | The same file is uploaded a second time. All occurrences are skipped because reports already exist. The result card reads "Import completed with no new reports". | Skipped |
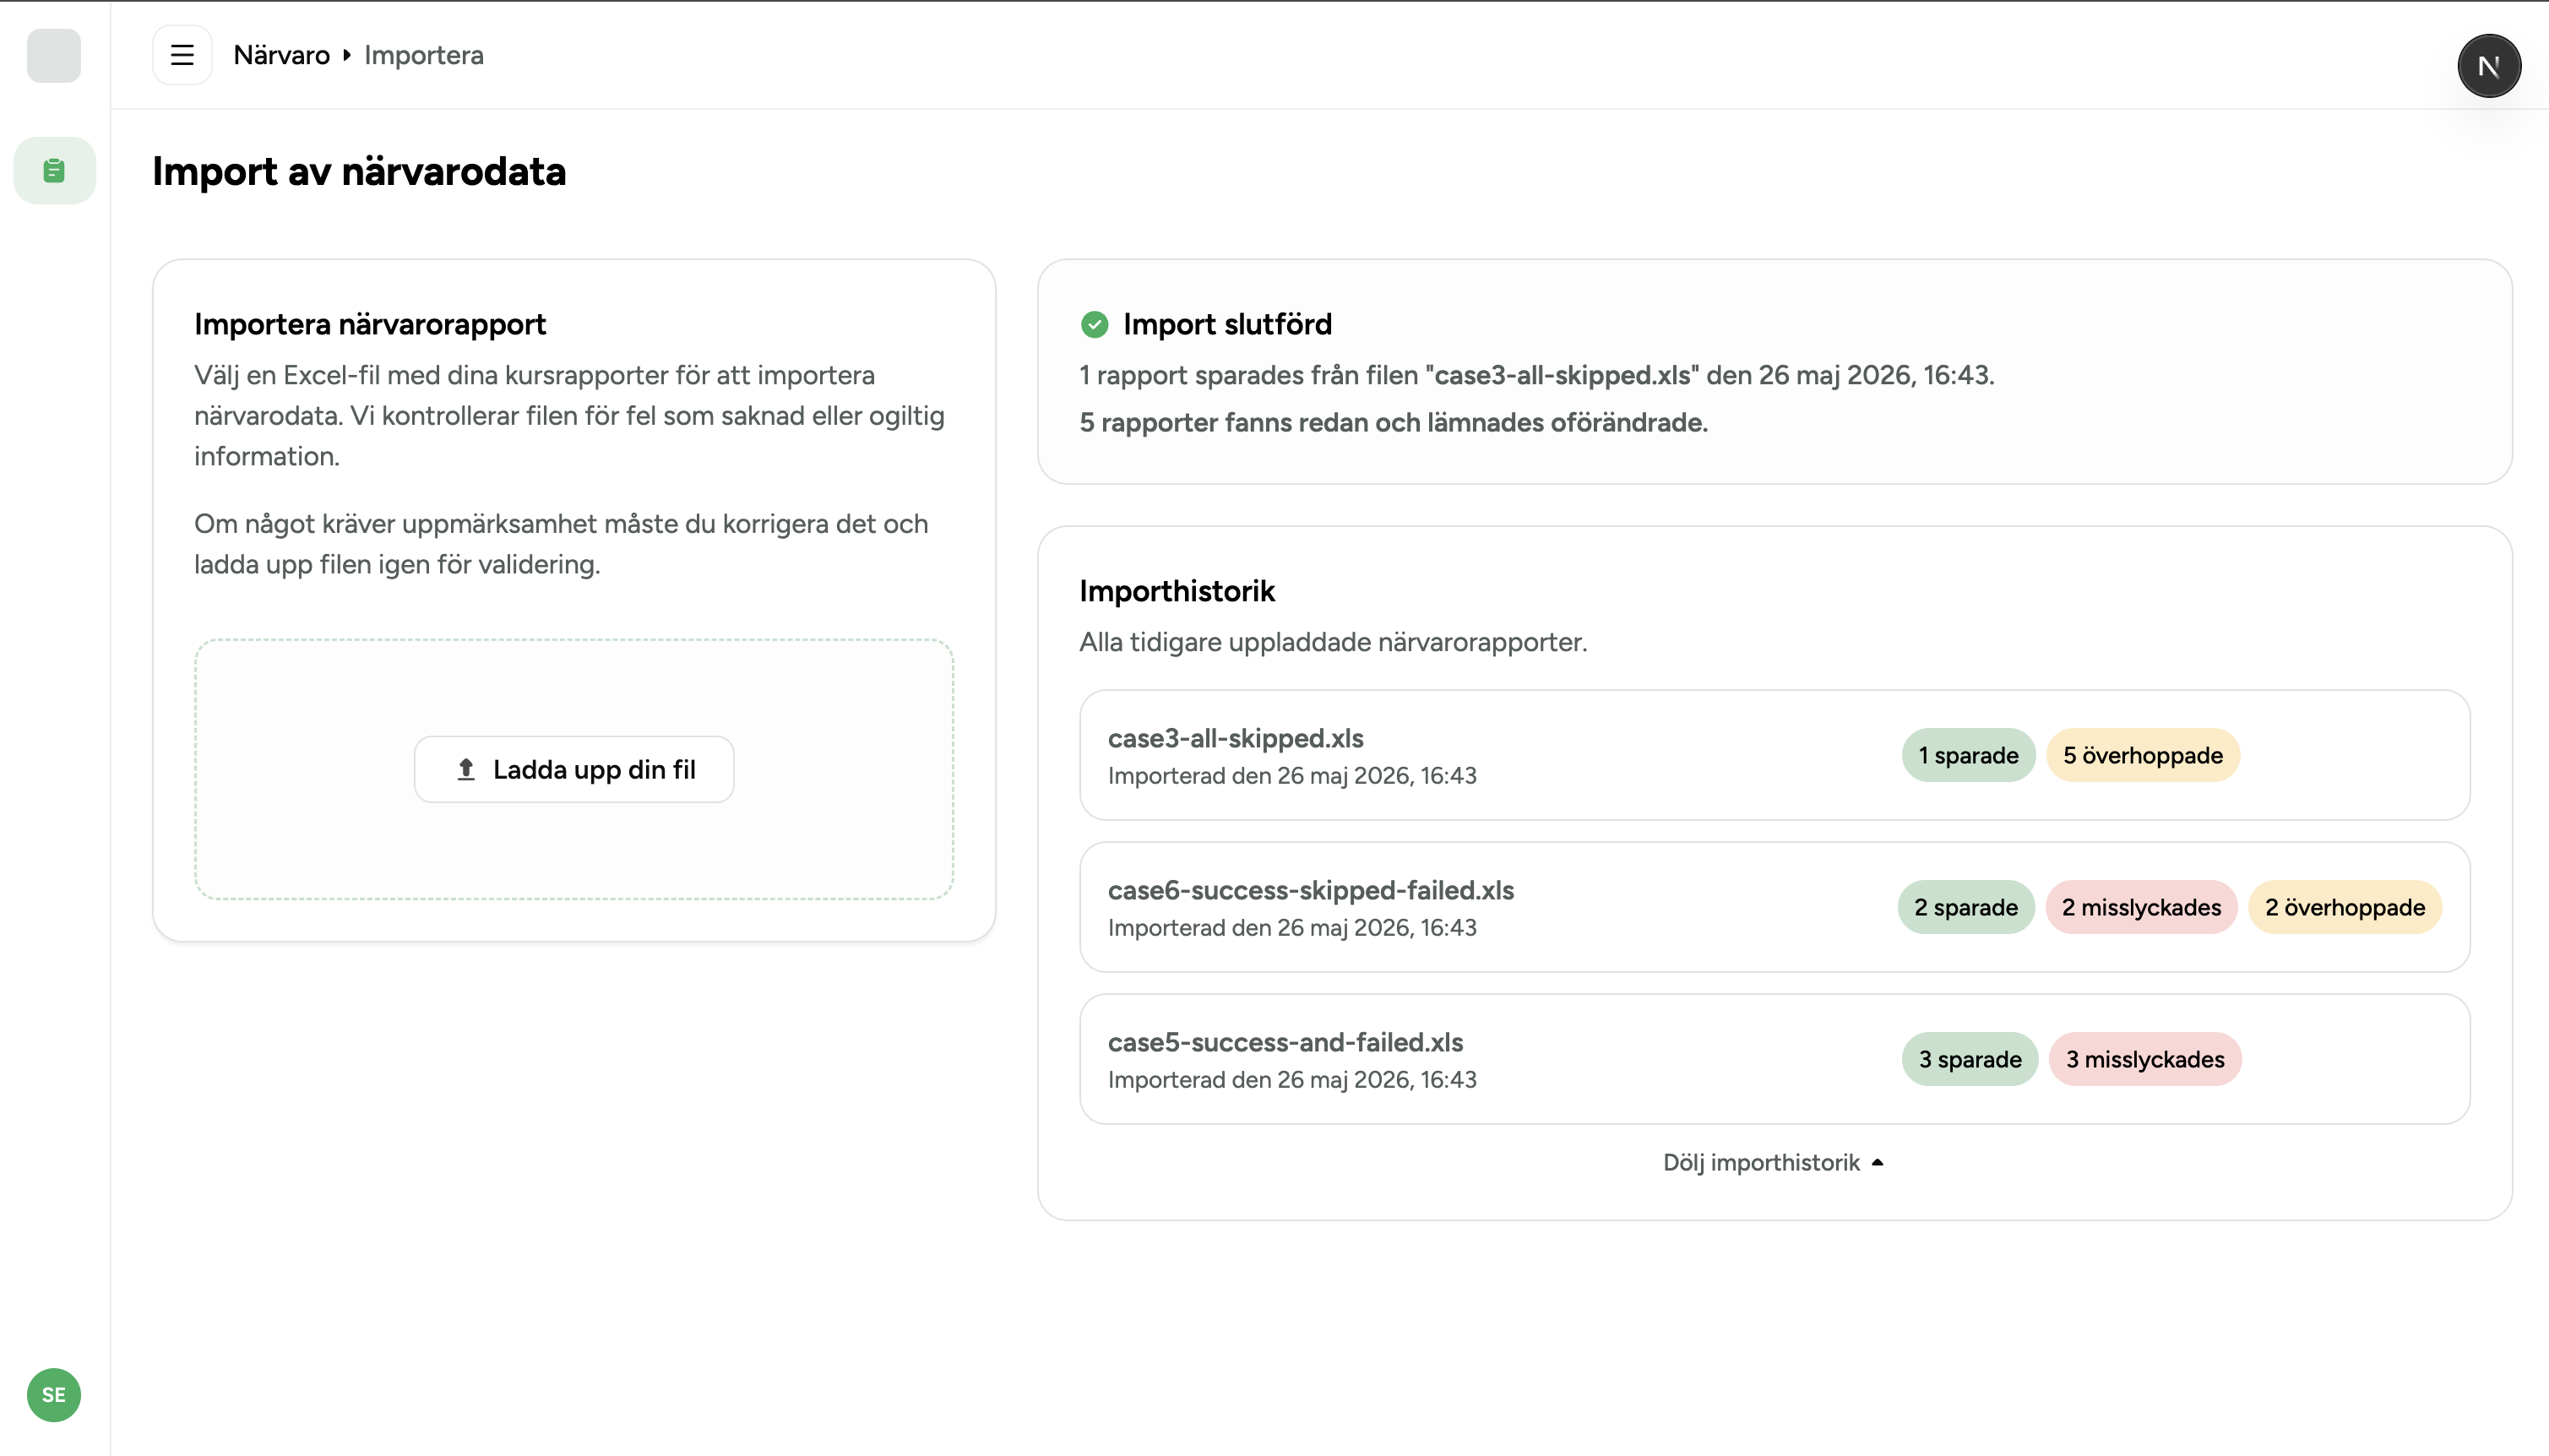
Import history
When the import page is idle — meaning no file has been uploaded yet in the current session — a collapsible Import history panel appears below the upload zone. It lists all past imports for the facility, newest first, each showing:
- The original file name
- The date and time of the import
- A result summary with outcome badges: N savedN failedN skippedN empty
This panel is useful for checking whether a file has already been imported, or for reviewing the outcome of a previous import without needing to re-upload the file.
Find the imported reports — ready to send
Once the import batch completes, all newly created reports appear immediately in Attendance → Reports. Filter by status In progress or Ready to send to locate them quickly.
A report is marked Ready to send automatically when the Excel file provided all required information: activity type, sport, location, date/time, and at least one participant with attendance marked. These reports can be sent to RF immediately without any further edits.
If any required field was missing or incomplete in the file, the report is created in In progress status. It must be opened and completed manually before it can be sent.

Reports with unregistered sports
MATCHi will save a report even if the sport listed in the Excel file is not registered with RF for this facility. The import itself succeeds without any error or warning for this condition.
However, when the report is later sent to RF, RF will reject it with an error such as "Sport with uuid: … is not connected to your Organisation". The report will appear as Failed in the Bulk Submission dialog with the category "Wrong report info".
Send reports to RF using Bulk Submission
With the reports created and validated, the next step is to send them to RF (Riksidrottsförbundet). Rather than opening each report individually, use the Bulk RF Submission feature on the Reports page.
Select the imported reports using the checkboxes in the reports table and click Send to RF, or use the Select and send all button to queue every eligible report in one action.
See the Bulk RF Submission guide for full instructions on tracking progress, handling errors, and re-sending failed reports.
